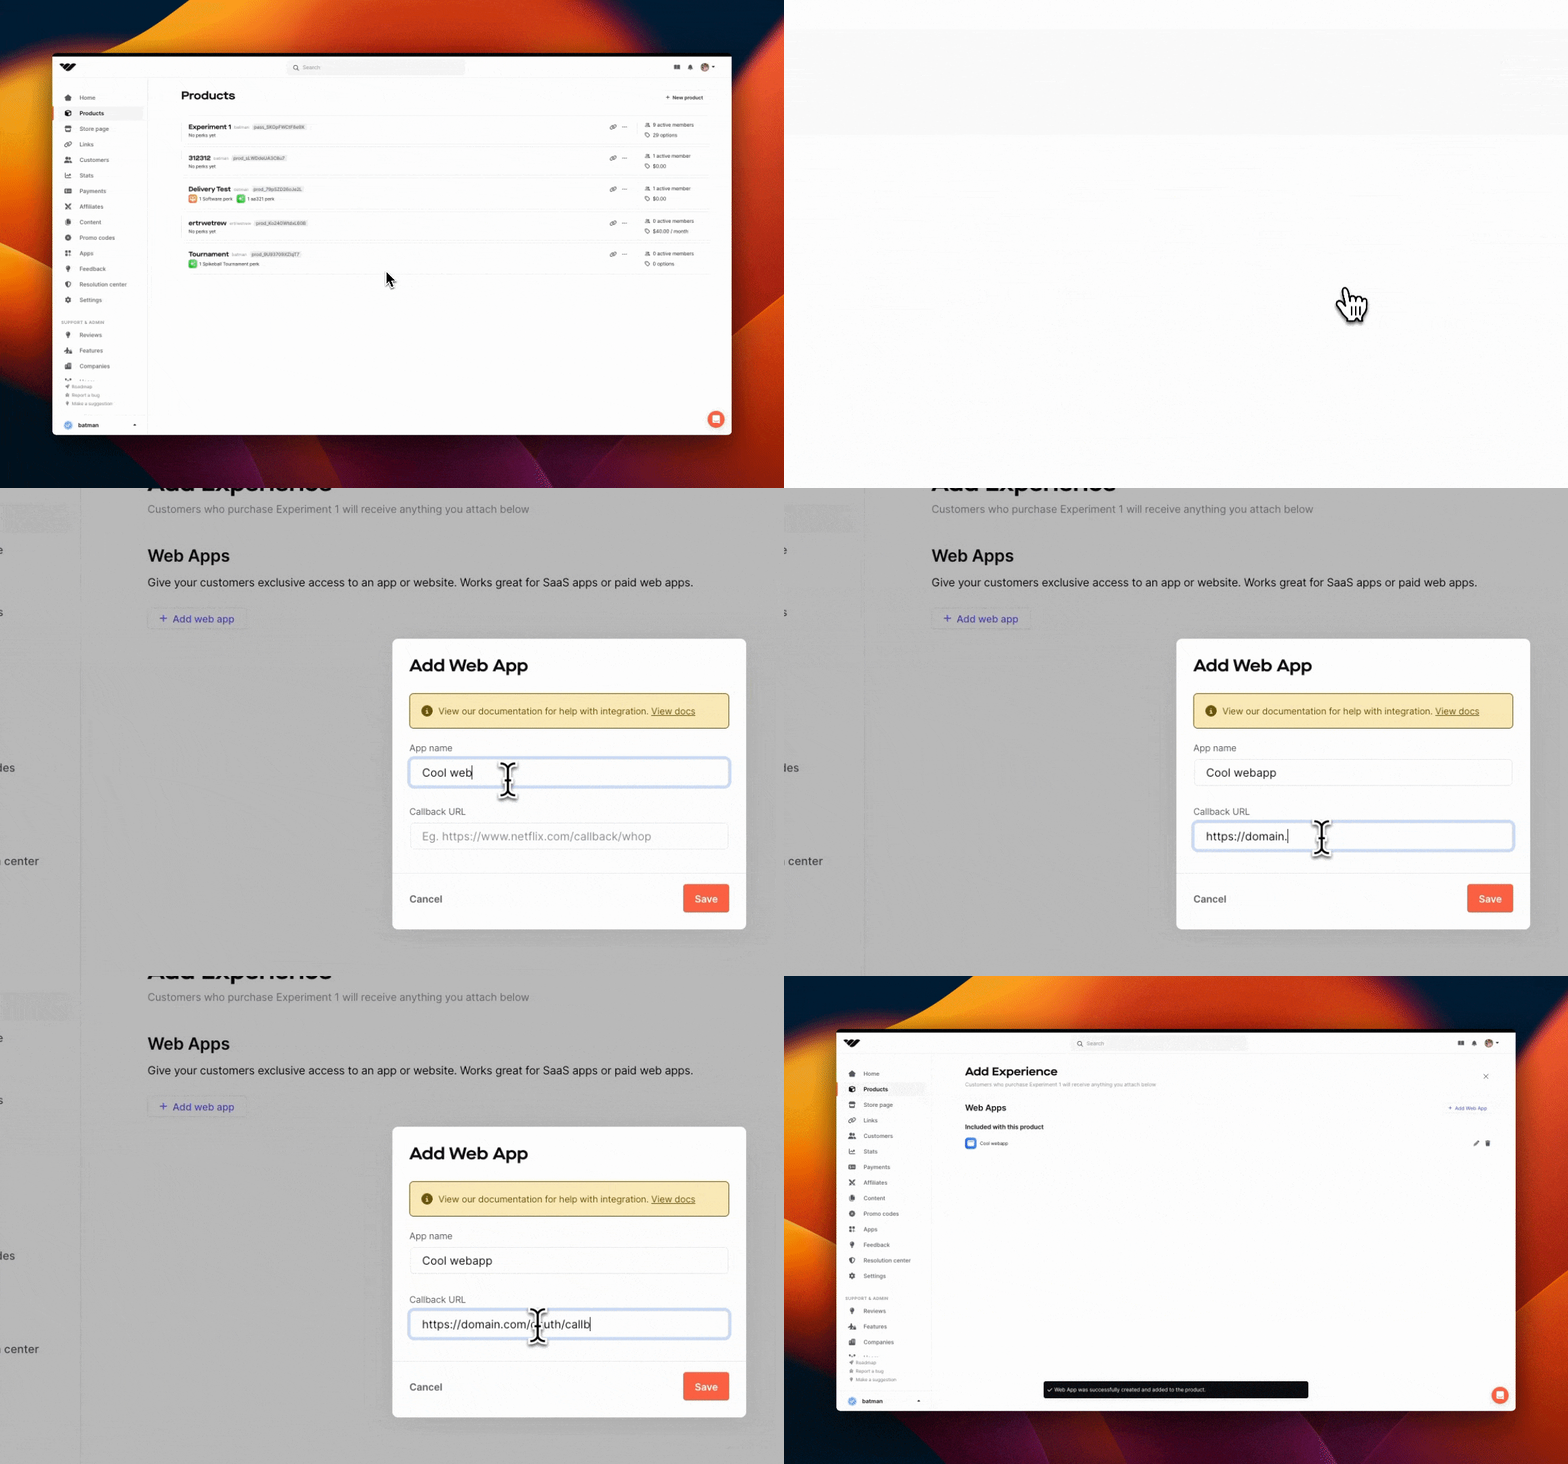
Web Apps
OAuth documentation guide
OAuth is a protocol that acts like a digital key, allowing authorized access to certain parts of your web application. It acts as a doorman, checking if the user has the right credentials (proof of purchase) before letting them in.

This guide covers the process when a user tries to access your webapp from the
Whop Hub. If you want to add in a Login With Whop button to your site,
follow this guide.
When to use OAuth
You should use OAuth if you have a website and want to allow users who have purchased your product on the Whop to access your site.Whop OAuth Examples
Adding a webapp to your product
Before we start, you should add a webapp experience to your product. You can do this by going to your product and clicking the Webapp option. From here you can add the name and the Callback URL. We will cover the steps to create one below.
OAuth Flow
Here is the flow for how OAuth works:- The user purchases your product
- Your user clicks on a link to your application from the Whop Hub.
- Your user is redirected to your application with a code in the URL.
- Your application requests an authorization token from the Whop API by exchanging the code from the URL.
- The Whop API returns an authorization token.
- Your application uses the authorization token to request data about the authenticated user.
Receiving a code
When your user tries to access your application from the Whop Hub, this is where they will be redirected.Creating your callback
This is where your users will be redirected when they try to access your application from the Whop Hub. It will contain a URL parameter calledcode.
Requesting an authorization token
Once you have received the code from the URL, you can use it to request an authorization token. Here is the response, you will need theaccess_token to make requests to the API.
You will need to pass the redirect_uri value as part of the payload. This is the same URL as the Callback URL you set when creating your webapp.
Once you have received the token, we advise you to store it in cookies or the
session so it can be accessed when needed.
Fetching the user
Now that you have the authorization token, you can use it to fetch data about the user. To see more details about this endpoint, click here.Error Codes
| Code | Response Body | Description |
|---|---|---|
| 400 | The provided authorization grant is invalid, expired, revoked, does not match the redirection URI used in the authorization request, or was issued to another client. | Check the code |
| 401 | Your access token is invalid. Please make sure you are passing an access token, and that it is correctly formatted. | Your access token is invalid, try generating a new one |
| 404 | Route {ROUTE} not found | Check the URL |

